Configuring RFC Items in Acceptance Check Menu
Before a cargo is accepted for air transportation, this procedure is necessary in setting up and verifying the list of Ready for Carriage items.
- Navigate to the Acceptance Check Menu screen. Click .
- Query the carrier where you want to set up the Acceptance Check.
- Click the ACC Check Menu link.
- To add the acceptance check items, click Add (Ins); the Acceptance Check Menu screen becomes available for editing.
-
To edit the existing acceptance check menu items, provide the necessary
information for the following fields:
Field Description Station Enter the Station record of the cargo. You can retrieve available Station records from the database. Clicking  navigates you to the Search
Airports Codes screen.
navigates you to the Search
Airports Codes screen.Carrier Enter the Carrier record of the cargo. You can retrieve available carrier records from the database. Clicking navigates you to the Search
Carriers Codes screen.Country of Manifest Dest Enter the Country of Manifest Destination record of the cargo. You can retrieve available Carrier records from the database. Clicking navigates you to the Search
Countries Codes screen.Country of AWB Dest Enter the Country of Air Waybill Destination record of the cargo. You can retrieve available Carrier records from the database. Clicking navigates you to the Search
Countries Codes screen.Rfc Code Enter the Special Handling Code of the cargo. You can retrieve available Rfc records from the database. Clicking
navigates you to the Search rfc_codes
screen.Rfc Item Selecting the Rfc Code automatically populates this field. Shc Code Enter the Special Handling Code of the cargo. You can retrieve available SHC records from the database. Clicking
navigates you to the Search shc screen.Shc Group Enter the Shc Group of the cargo. You can retrieve the appropriate group record of the SHC based on the SHC code you selected. Clicking
navigates you to the Search combo_codes
screen.Auto Populate Specify if RFC items will be auto-populated. Is Hidden Specify if RFC item is hidden. Select either of the following: - HHT
- No
RFC Codes Enter the specific Ready for Carriage code. SHC Codes Enter the specific Special Handling Code. SHC Groups Enter the specific Special Handling Code Group. - Click OK to save your changes.
You can validate the RFC items according to the RFC acceptance
checklist:
- CSD - CARGO SECURITY DECLARATION
- RAK - RAKC DATABASE CHECKED
- FWB - FWB MESSAGE RECEIVED
- CUS - CUSTOMS CLEARANCE
- AVI - LIVE ANIMAL CERT
- GDP - GDP CHECK DONE
- IDC - ID CHECKED
- DAV - DATA VERIFIED
- VOL - VOLUME CHECKED
Once all the required items are validated, the color of the RFC button turns from red to green.
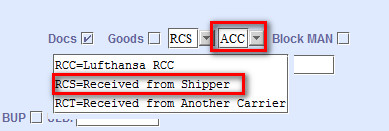
Ensure that you have set the freight status and documents for the station as RCS=Received from Shipper, and the delivery status as ACC=Accepted Goods/Docs.